Java Spring Boot Project - Part 2

In the previous blog post, we covered the initial setup of a Book Library Project using Java Spring Boot. In this blog post, we will use Lombok to simplify the creation of the Book Entity class. We will then create a repository, service, and controller class to perform CRUD operations on the Book Entity.
Using Lombok for the Book Entity
Lombok is a library that helps reduce boilerplate code in Java classes by providing annotations to generate getters, setters, constructors, and other common methods automatically. In this blog post, we will leverage Lombok to simplify the creation of the Book Entity class in our Java Spring Boot project.
-
Step 1: Add Lombok Dependency
To use Lombok in your project, you need to add the Lombok dependency to your
build.gradlefile. You can copy the latest version from the Maven Central Repository or add the following line in thedependenciesblock:compileOnly 'org.projectlombok:lombok:1.18.32'After adding the dependency, sync your Gradle project to download the Lombok library.

-
Step 2: Create the Book Entity Class
The Lombok
@Getterand@Setterannotations automatically generate getter and setter methods for the fields in a Java class.@Gettercreates a public method to retrieve the value of a field, while@Settercreates a public method to set the value of a field. This reduces boilerplate code, making the class definitions cleaner and easier to read.We will use these annotations to create the
Bookentity class. Open theBook.javafile and add the following code: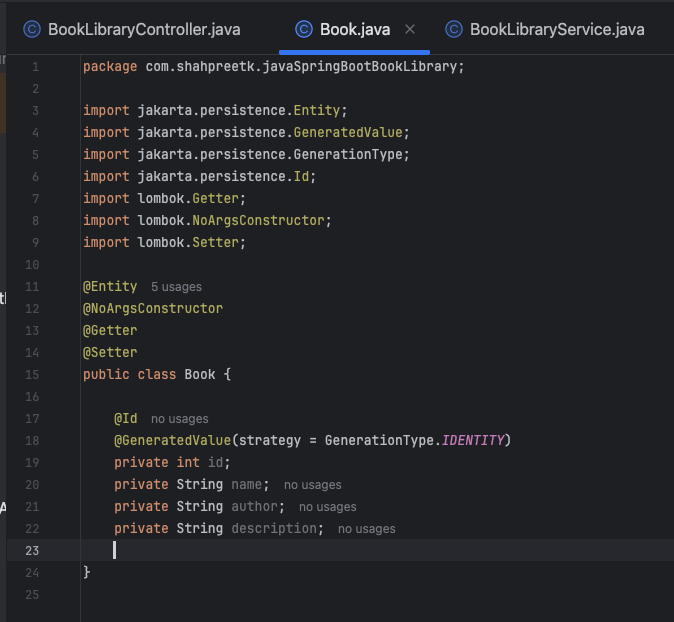
Get All Books
-
Step 3: Create the Book Repository
Next, we will create a repository interface to interact with the
Bookentity. Create a new interface namedBookLibraryRepositoryin the package and extend it with theJpaRepositoryinterface provided by Spring Data JPA: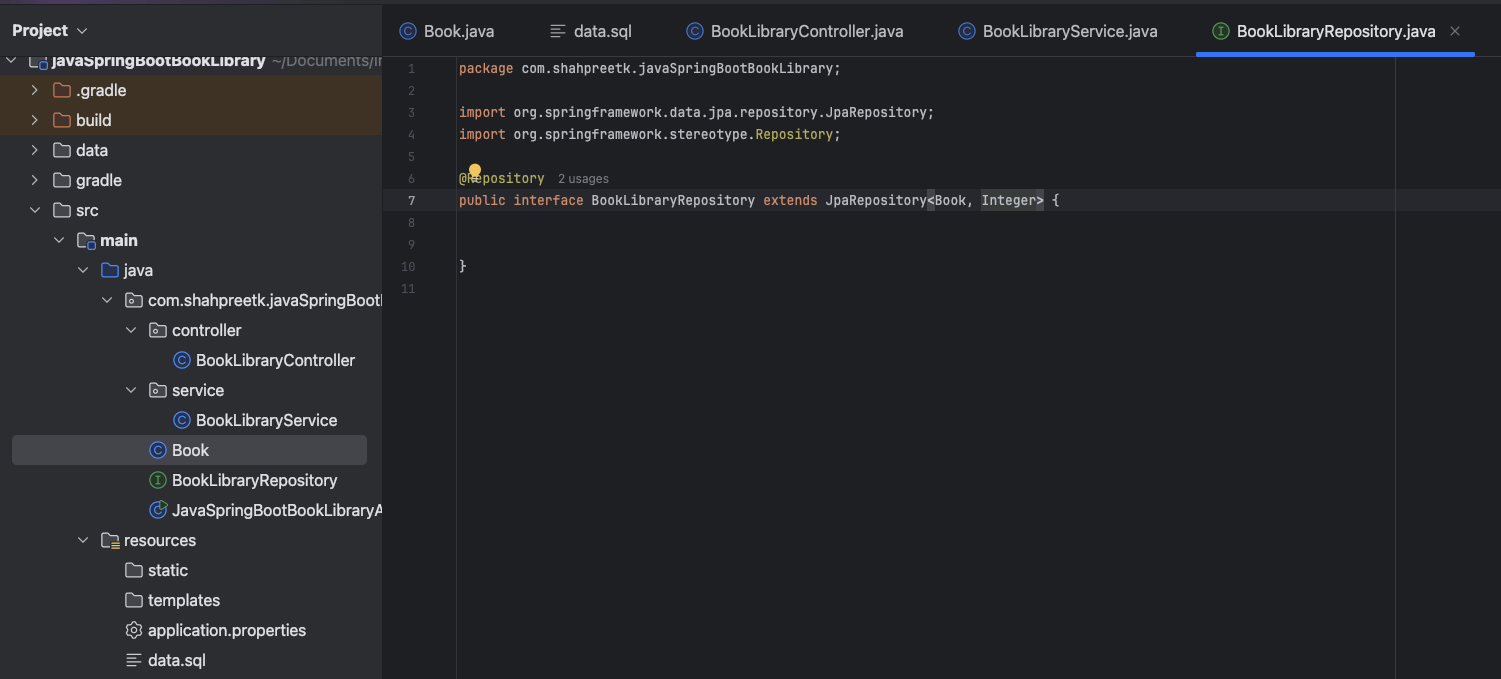
-
Step 4: Create the Book Service
Now, we will create a service class to handle business logic related to the
Bookentity. Create a new class namedBookLibraryServicein theservicepackage and annotate it with@Service: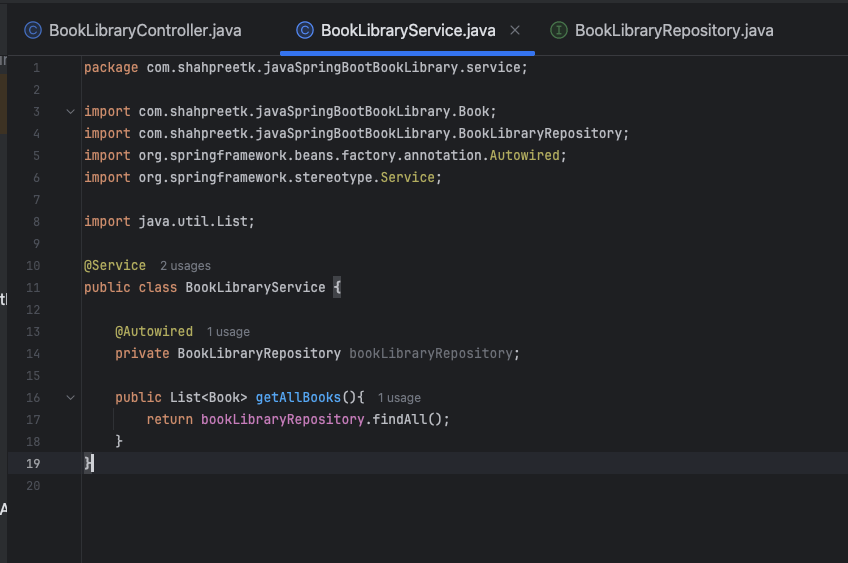
-
Step 5: Create the Book Controller
Finally, we will create a controller class to expose RESTful endpoints for CRUD operations on the
Bookentity. Create a new class namedBookLibraryControllerin thecontrollerpackage and annotate it with@RestController: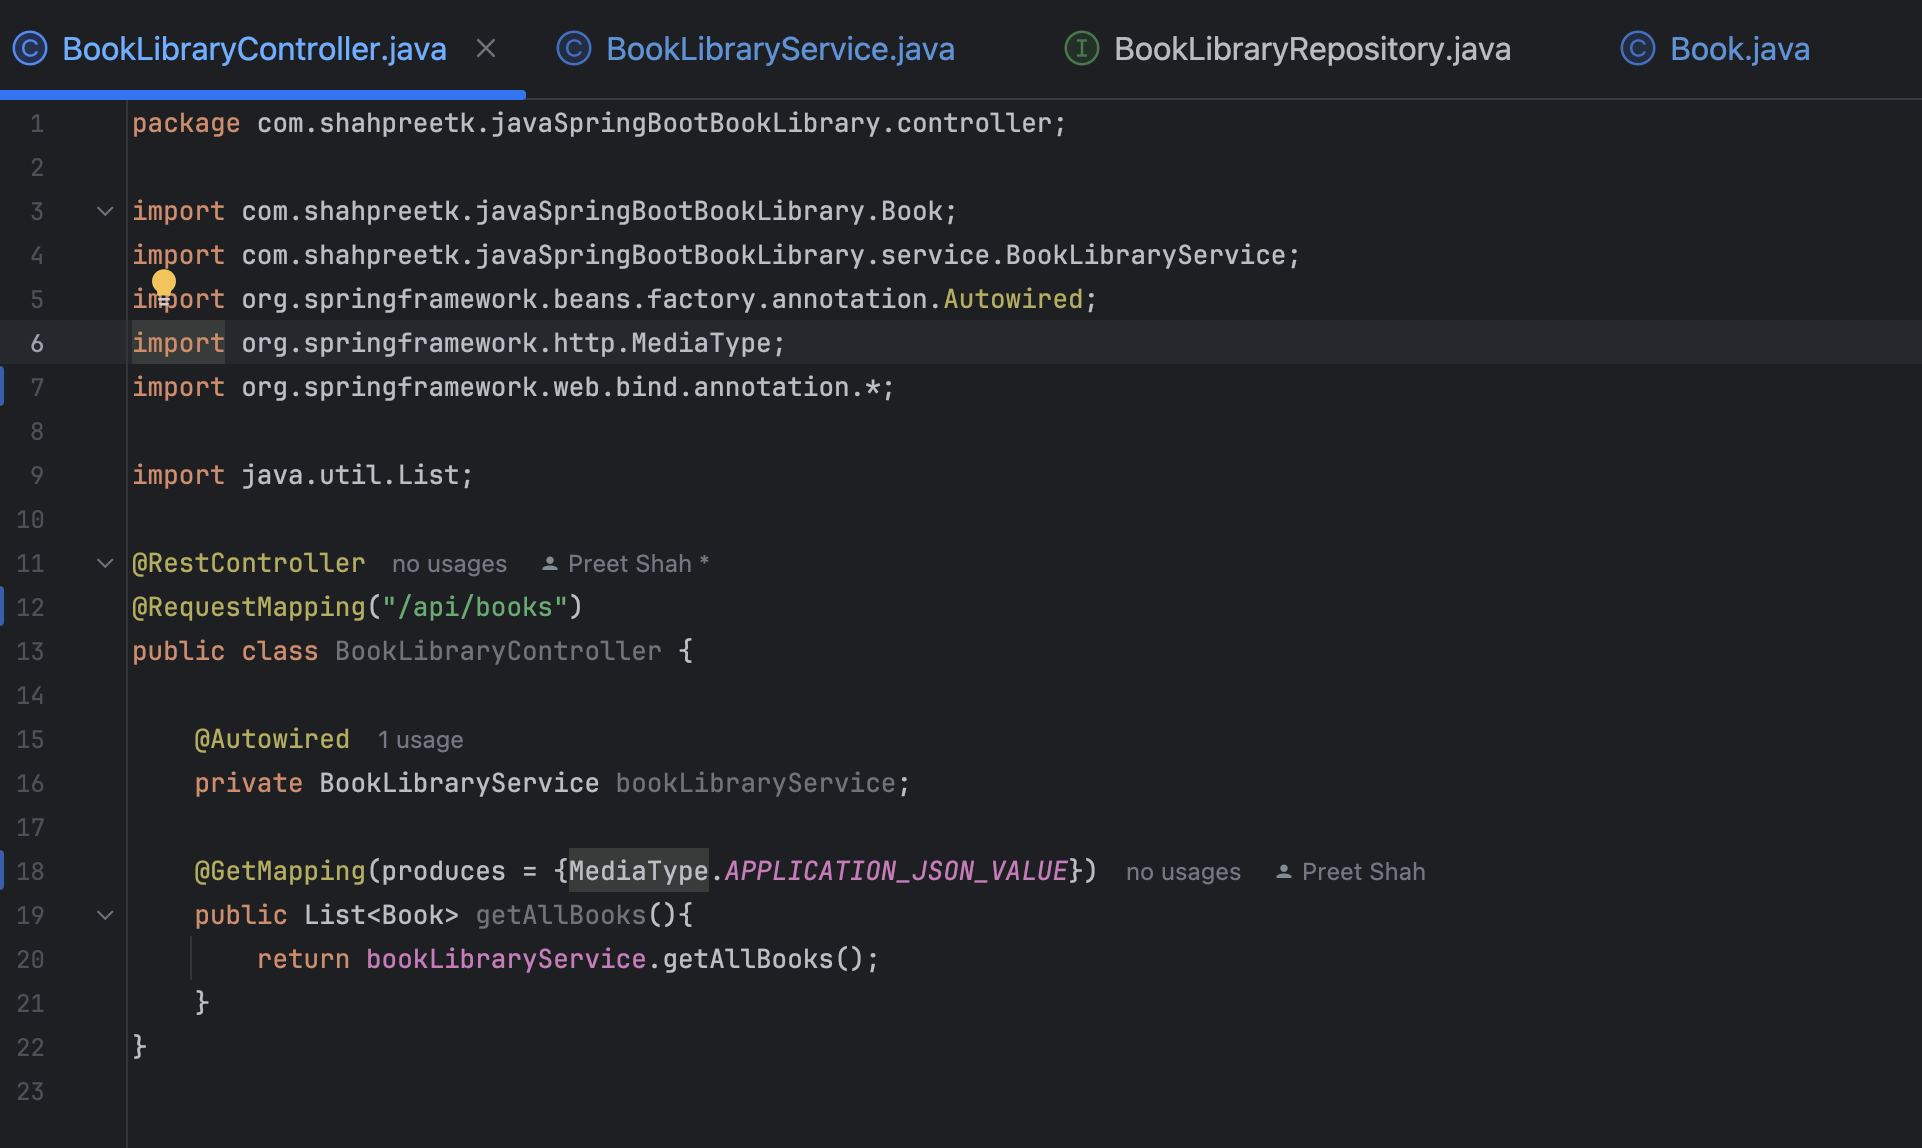
-
Step 6: Start the server and test the API in the browser
Run the project and navigate to
http://localhost:8080/api/booksin your browser. You will see an empty ouput: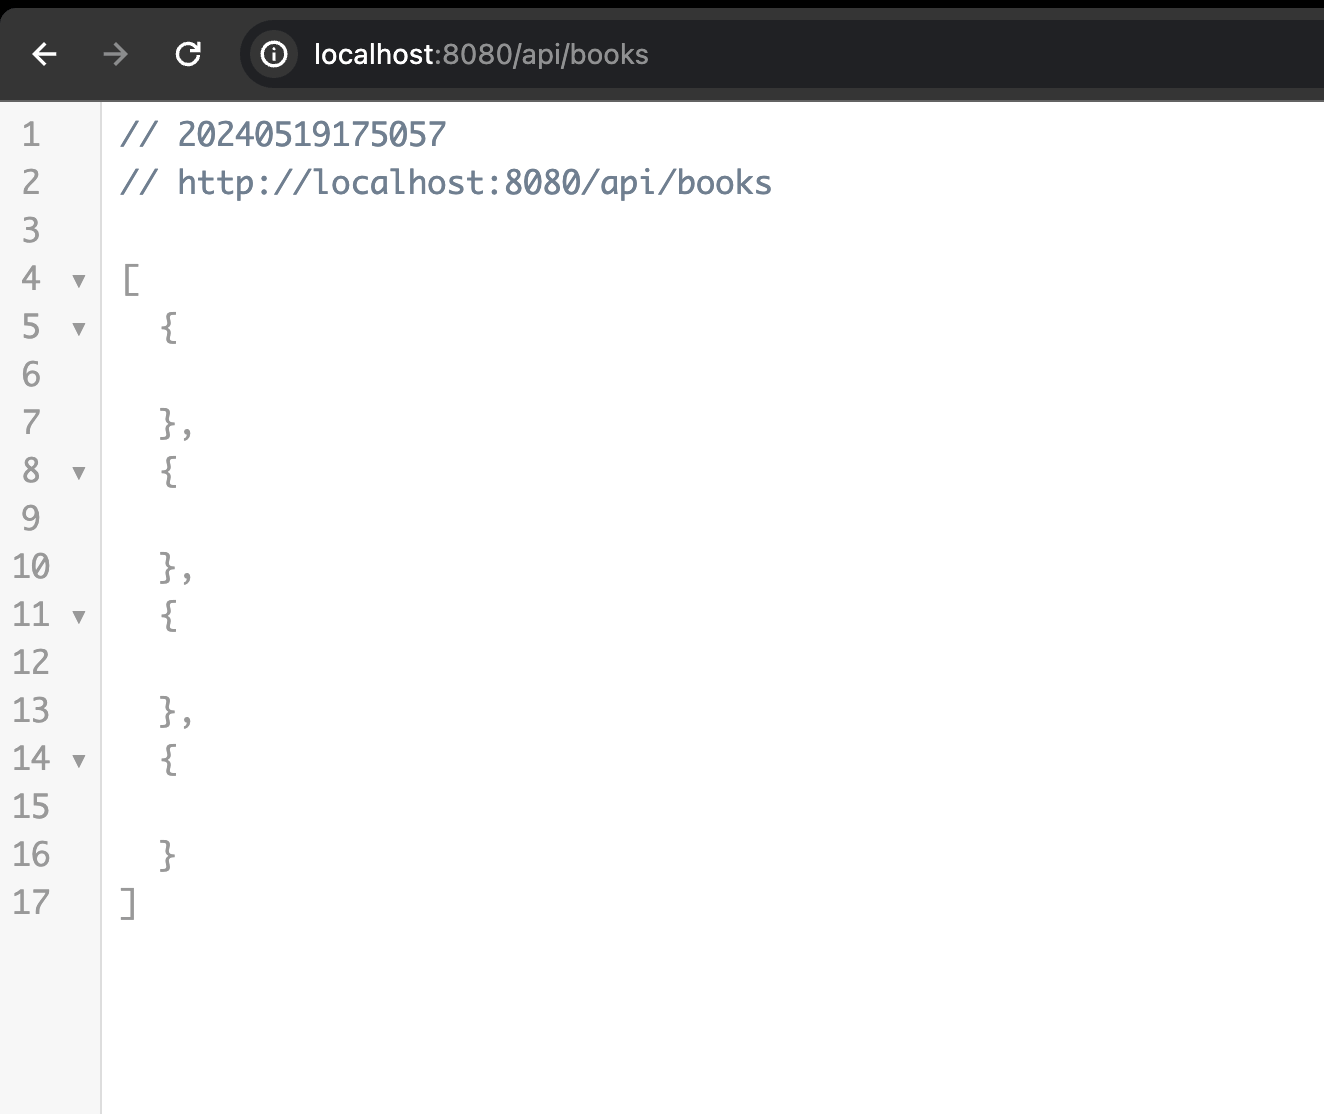
Even though we have data in our H2 database, the browser shows an array with multiple empty objects. This is because the
BookLibraryRepositoryis not mapping the data from the database to the JSON we are trying to return.I tried multiple StackOverflow solutions, such as adding a Lombok Plugin or the
jackson-databind dependency, but none worked because the plugin doesn't help at runtime and thejackson-databinddependency was already present in the project as a default part of thespring-boot-starter-webdependency. -
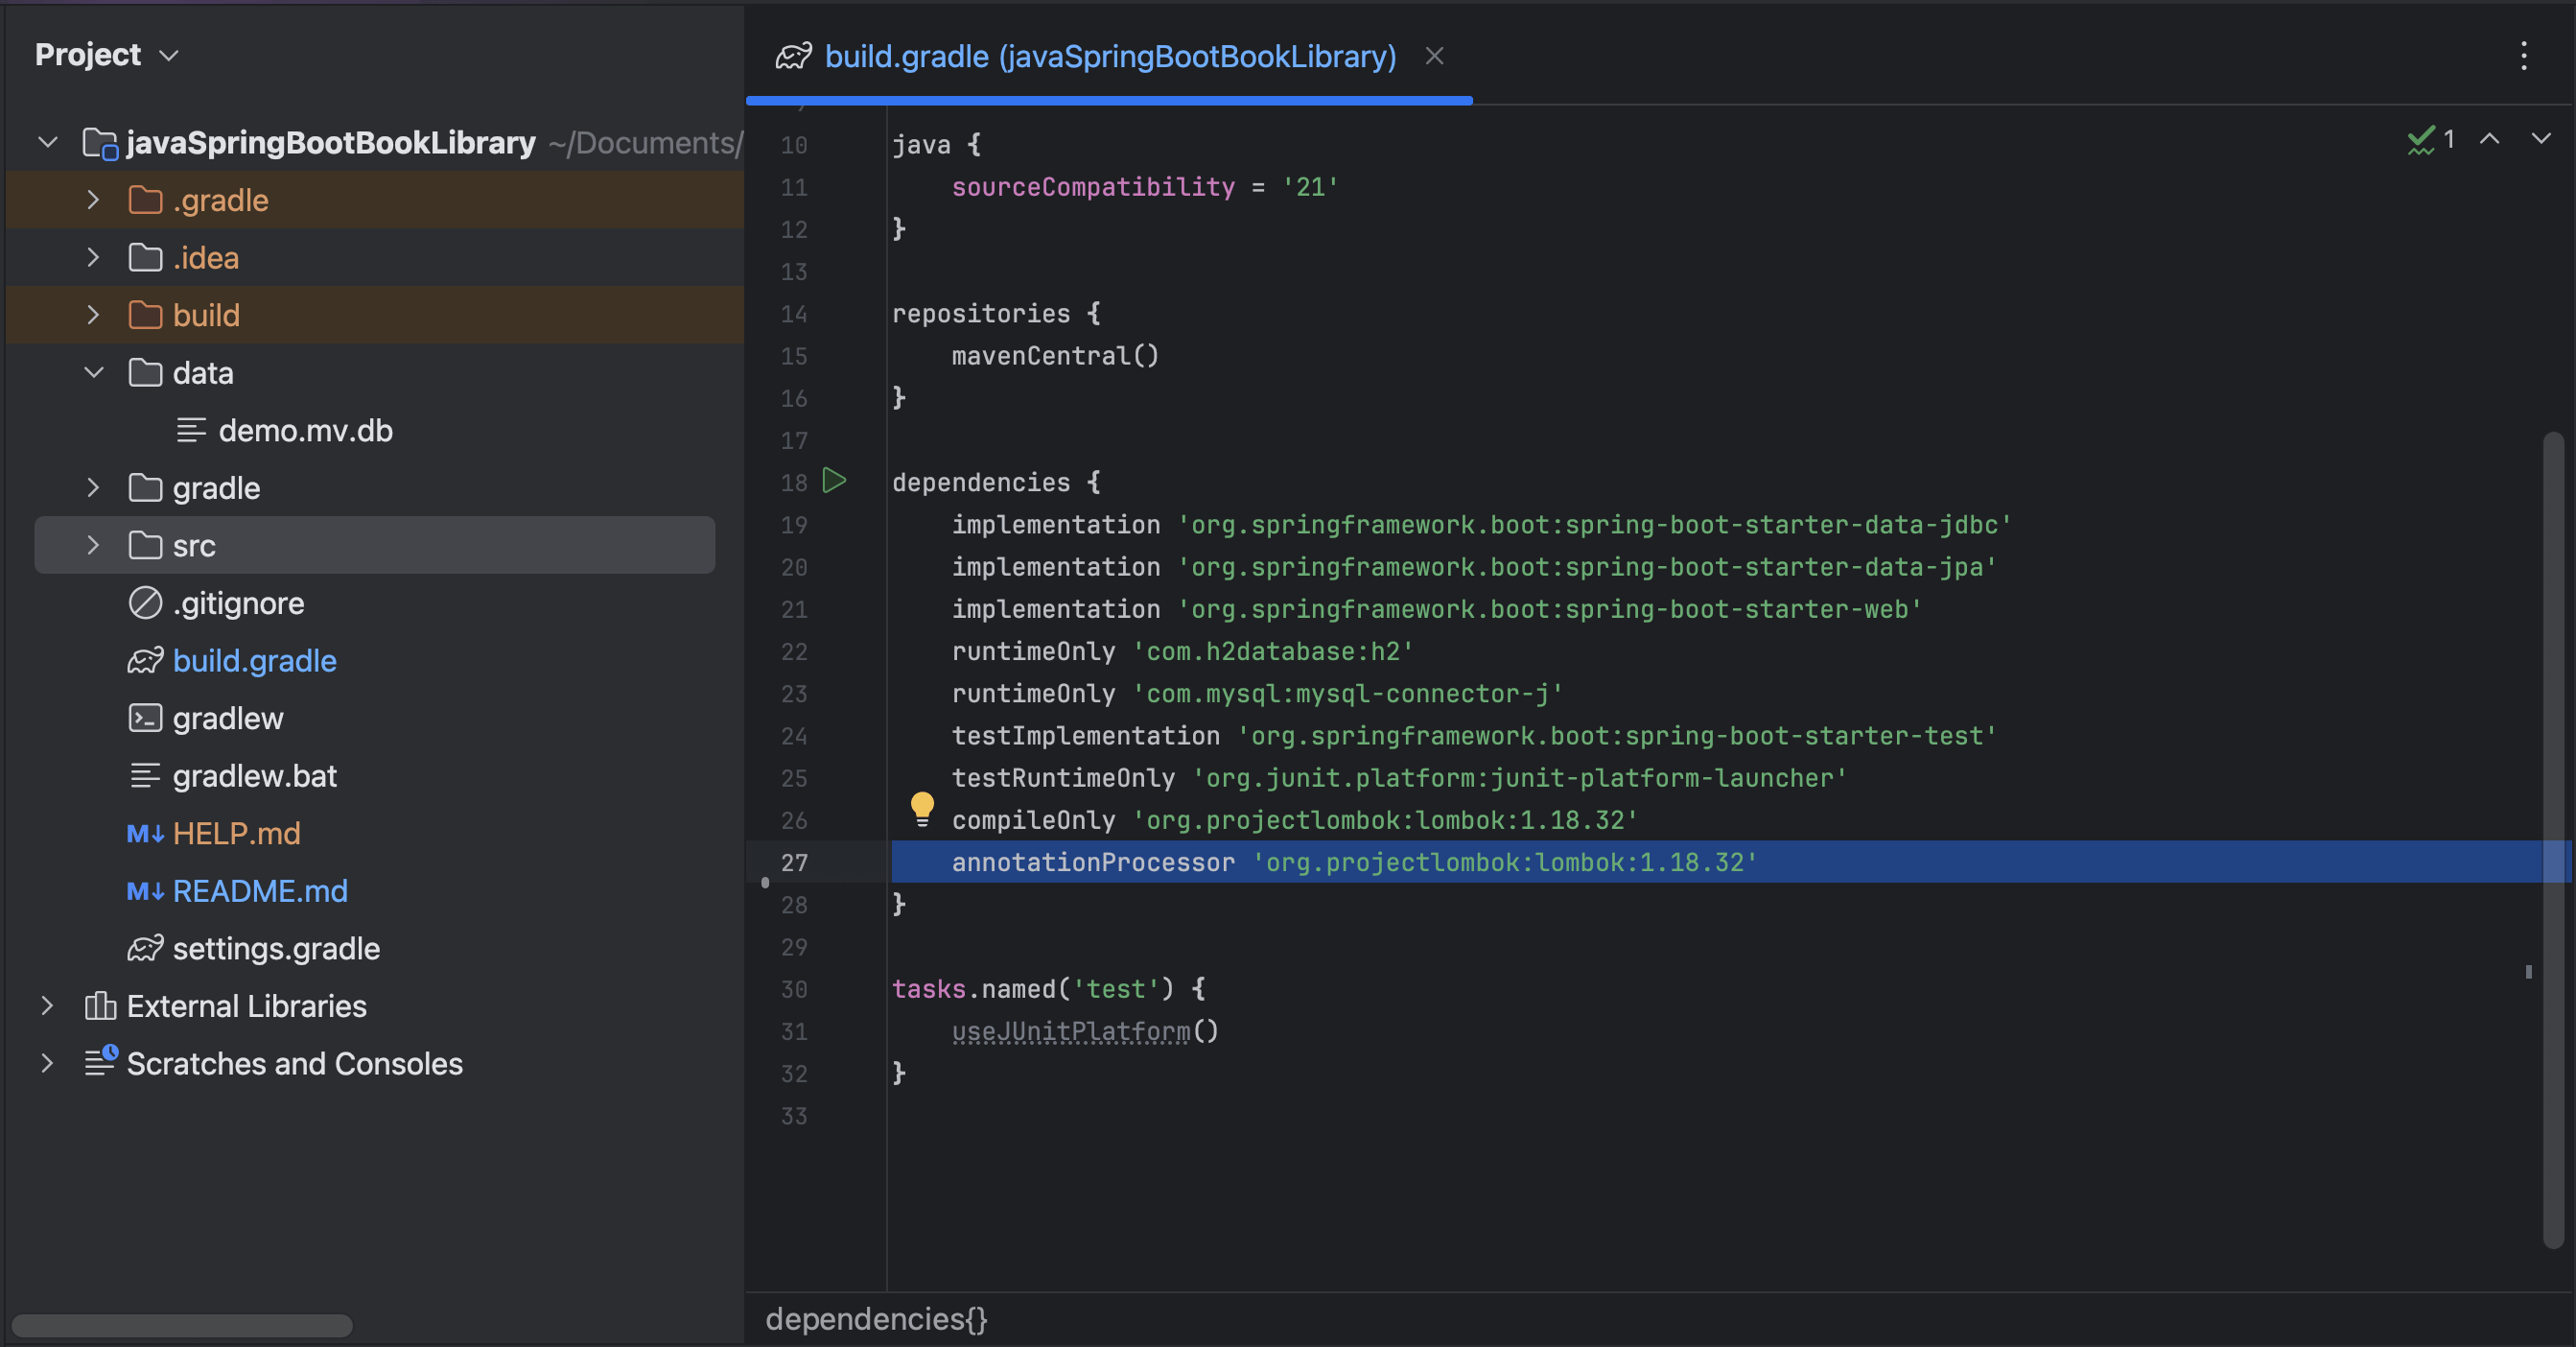
Step 7: Solution to the JSON issue
The solution was to add the
Lombok dependencyto thebuild.gradlefile as aannotationProcessoralong with thecompileOnly. This is because theannotationProcessorscope is used to process annotations at compile time, necessary for Lombok to generate the necessary methods in the compiled class files. Sync the Gradle project after adding theannotationProcessorscope.The
compileOnlypart of the dependency is needed to compile the project, without which the import statements for the Lombok annotations would not be recognized by the compiler.note- Please install the Lombok Plugin from the IntelliJ IDEA marketplace (
Settings->Plugins) to enable the IDE to recognize the Lombok annotations. - Then go into the
Settings->Build, Execution, Deployment->Compiler->Annotation Processorsand check the box forEnable annotation processing.
Run the project again and navigate to
http://localhost:8080/api/booksin your browser. You should now see the list of books displayed correctly in JSON format.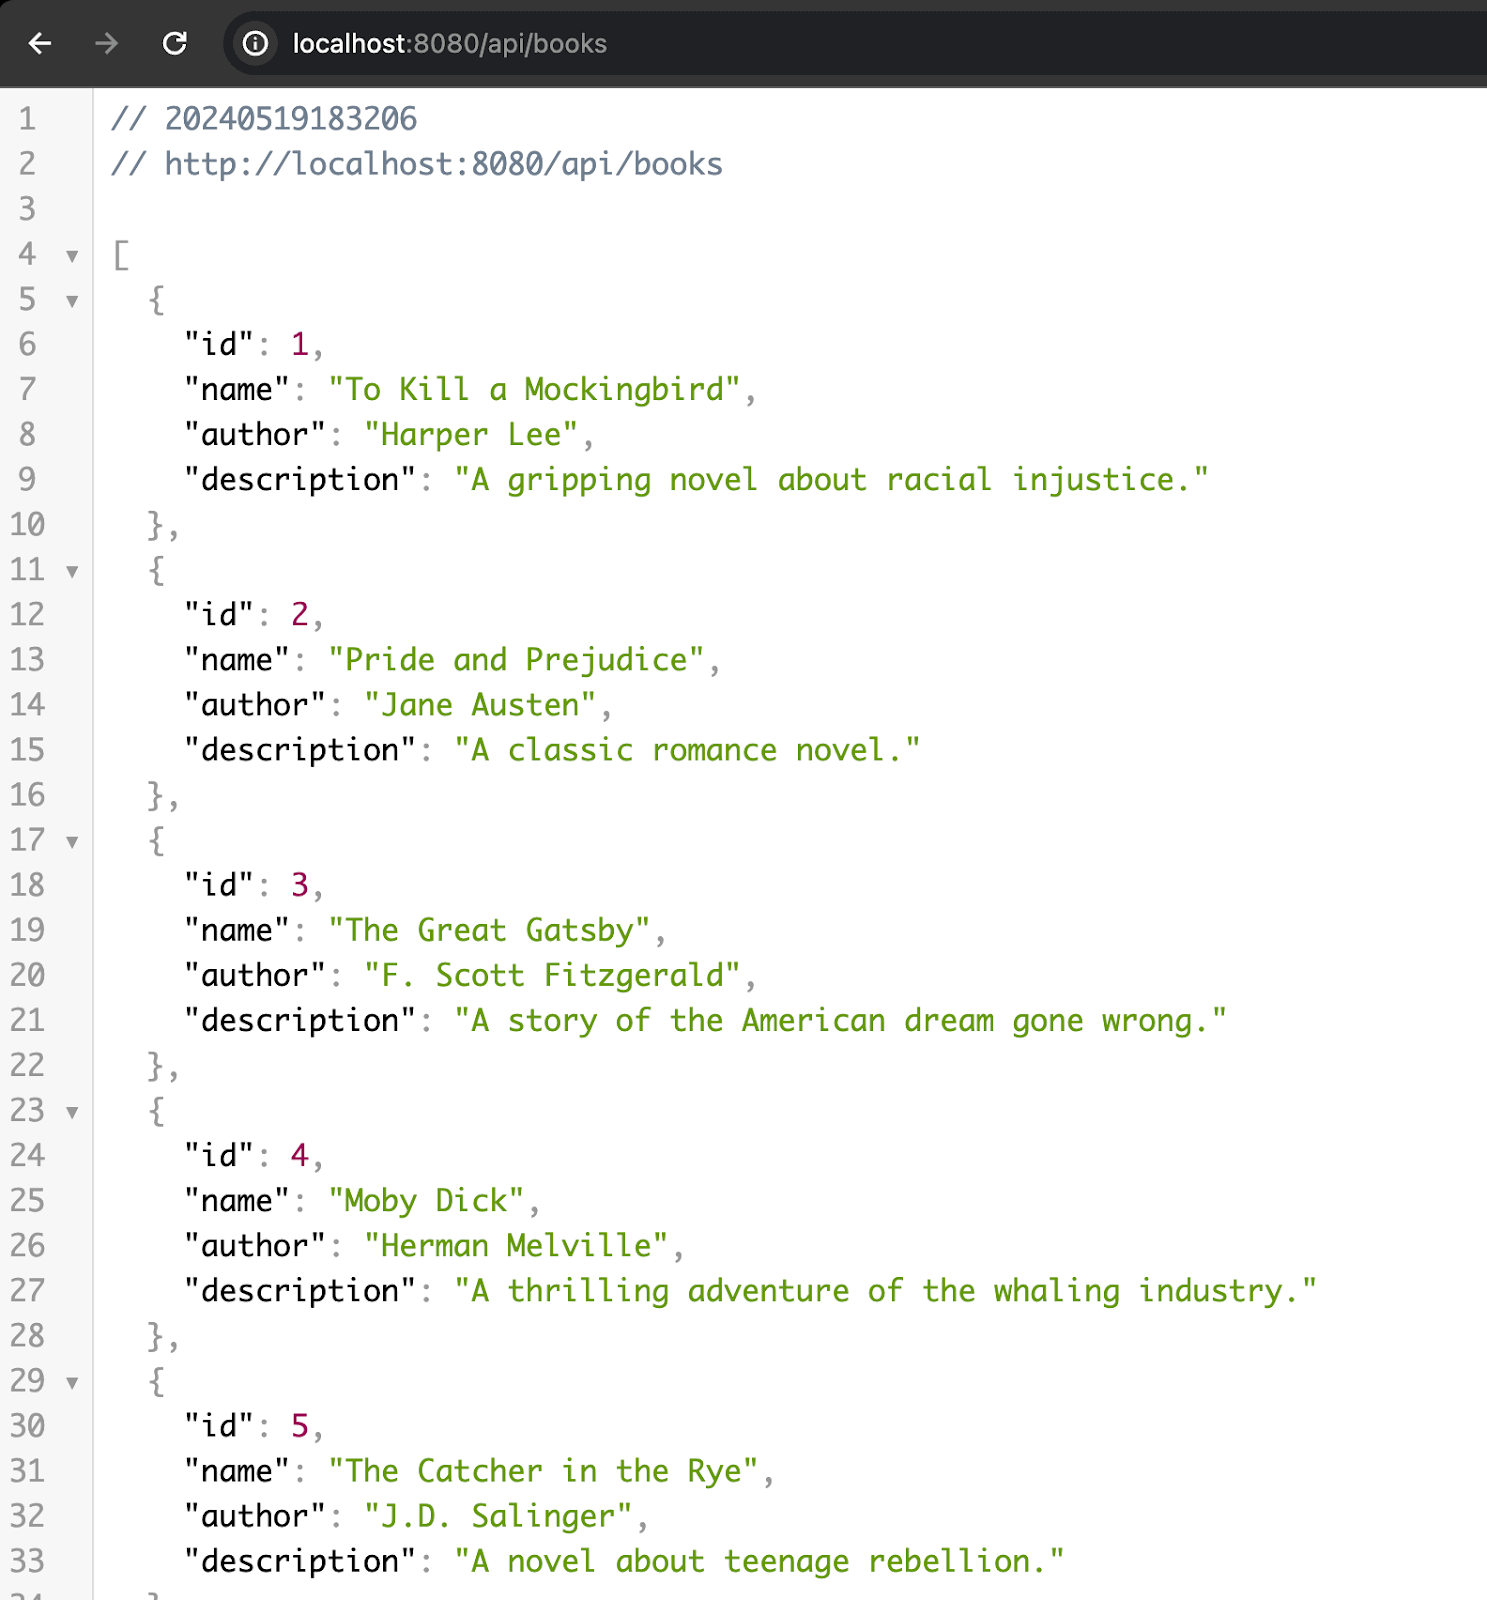
- Please install the Lombok Plugin from the IntelliJ IDEA marketplace (
-
Step 8: Testing the GET API using Hoppscotch.io
In the past, I used Postman to test the API, but now it requires users to create an account.I recently discovered Hoppscotch.io, a free and open-source, lightweight, web-based API development suite. You can use it to test the GET API by entering the URL
http://localhost:8080/api/booksand clicking on theSendbutton.Since our app runs on
http, Hoppscotch.io will throw an error. To solve this, you can use the Hoppscotch browser extension. It can be downloaded from the following links:Once you have the extension installed, reload the page and re-send the request. Then choose the Browser extension option from the error and click on the
Sendbutton. You should see the list of books displayed in JSON format.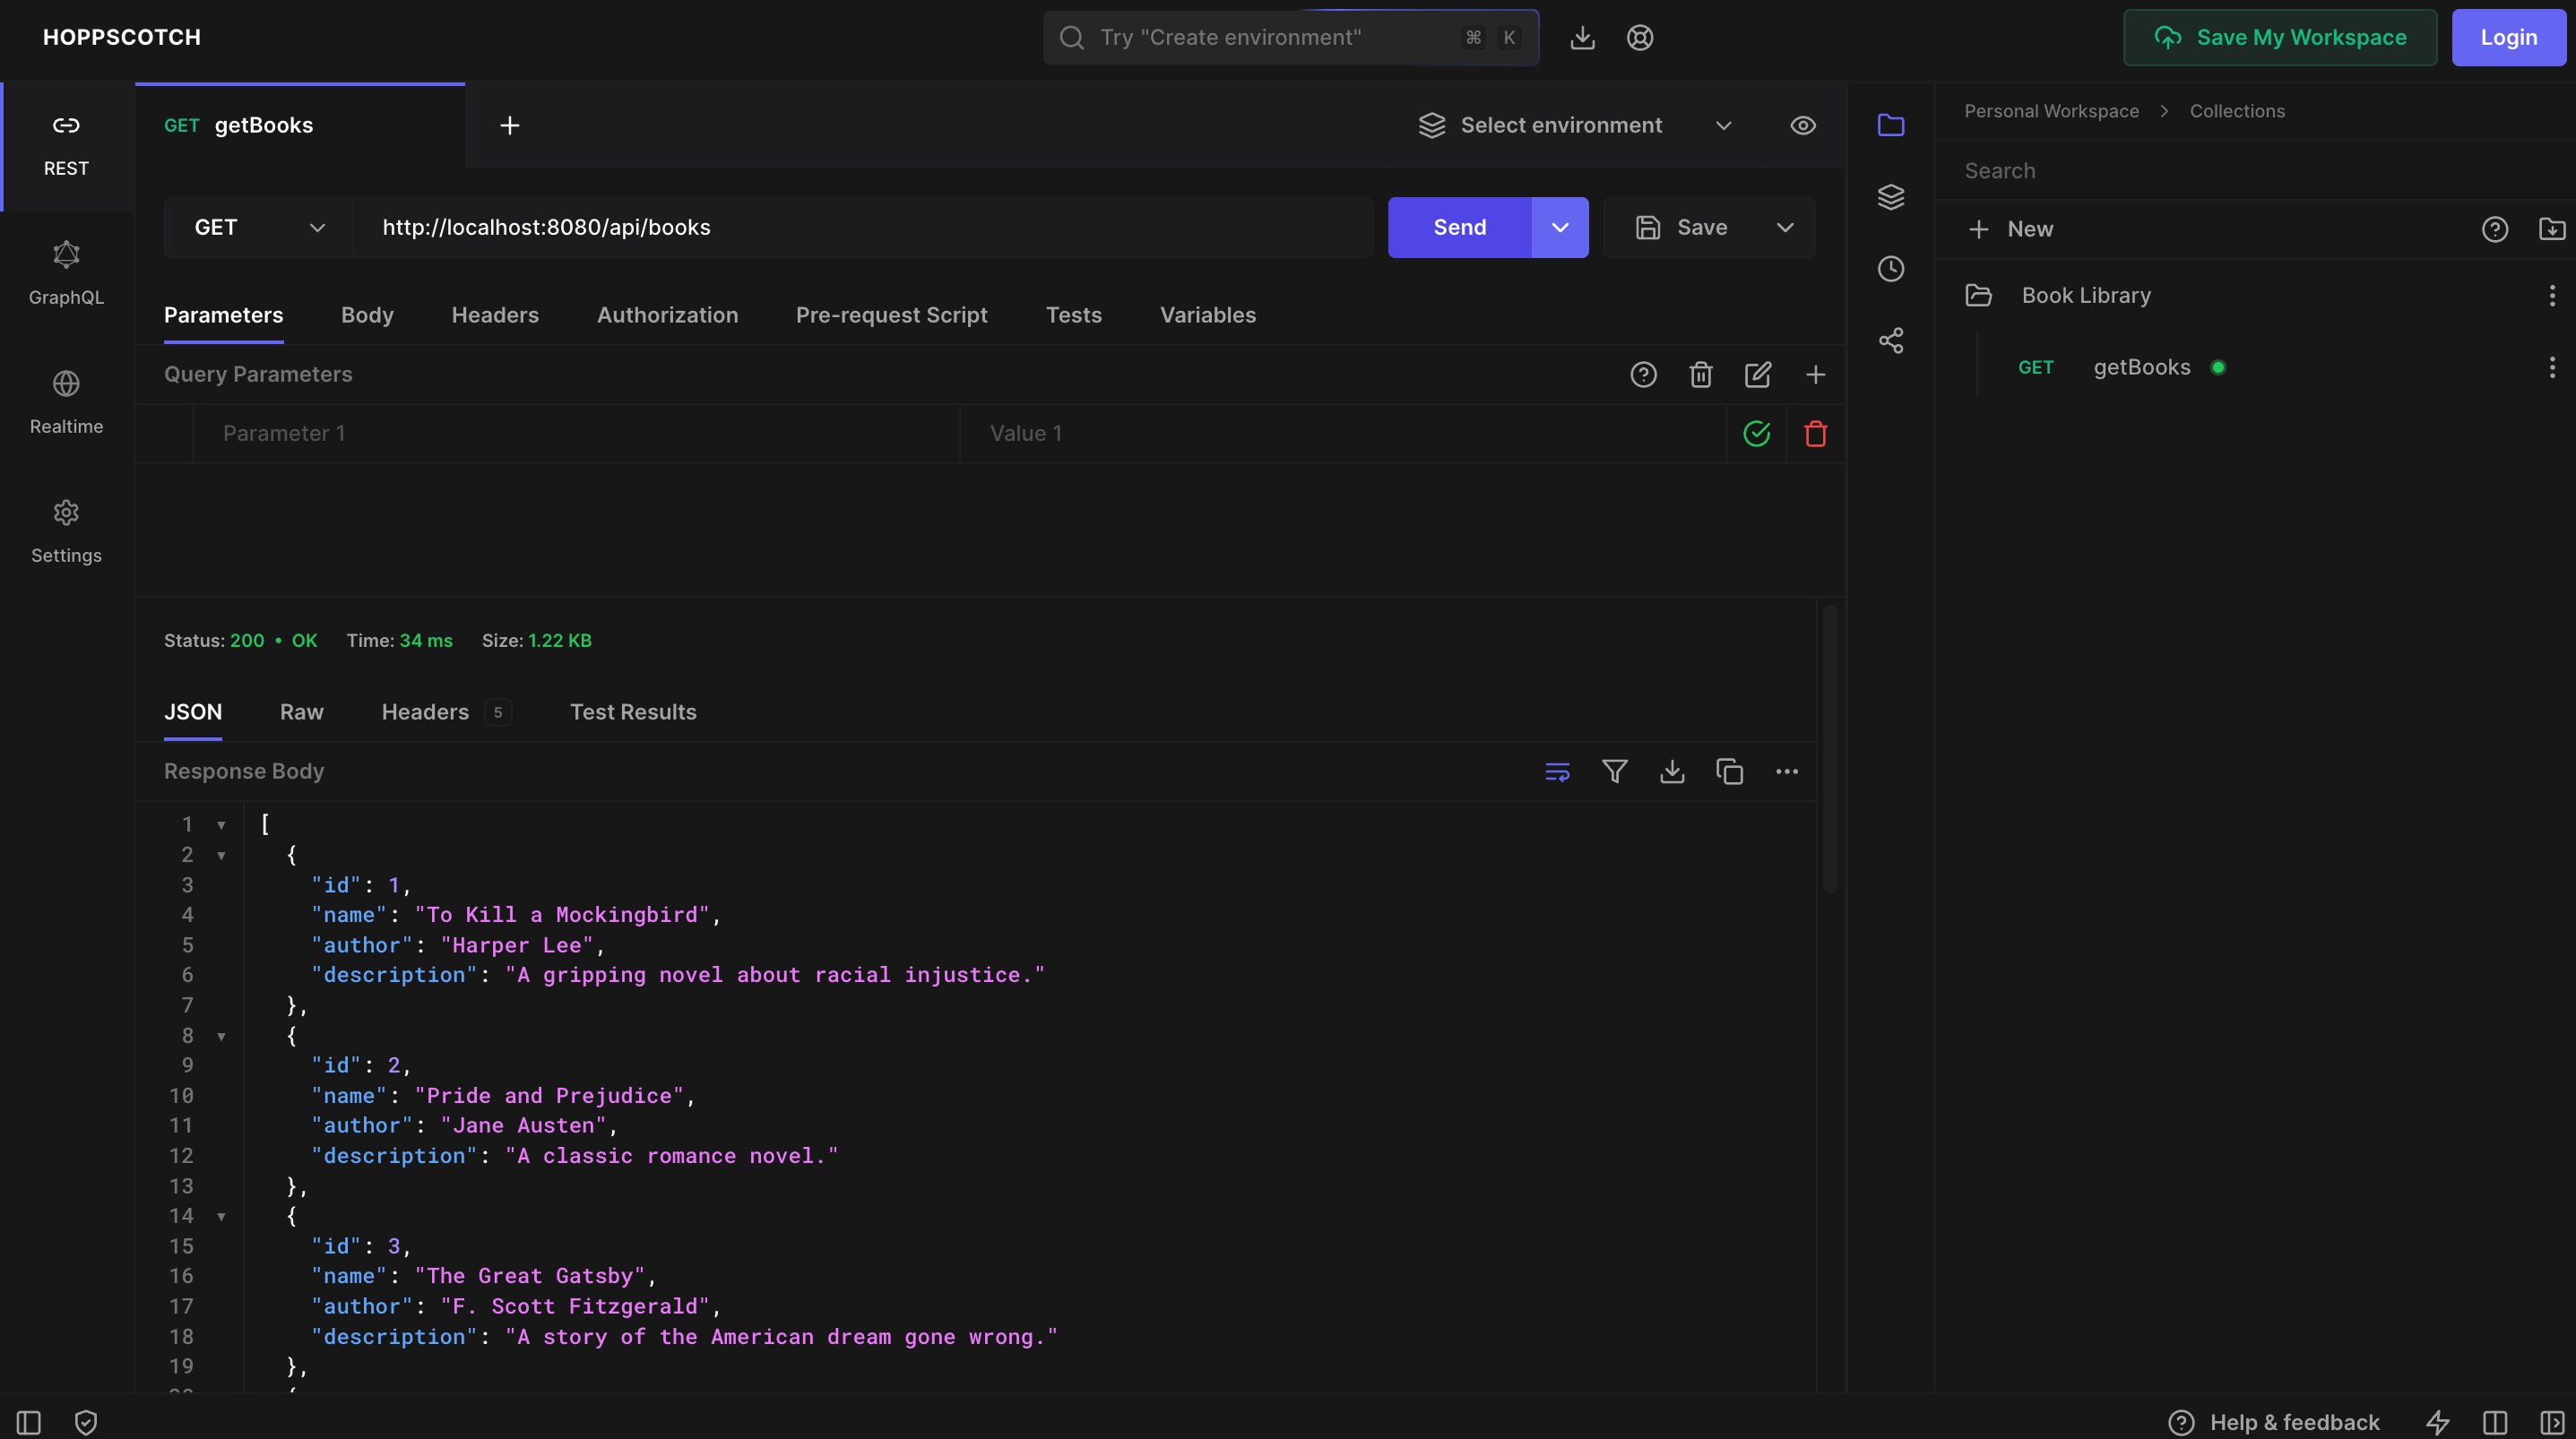
CRUD Operations on the Book Entity
In the above section, we saw how to GET all the books from the database. Now, let's implement the remaining CRUD operations on the Book entity.
Create a New Book
To create a new book, we need to implement a POST API that accepts a JSON payload containing the book details. Add the following method to the BookLibraryController class:
// In BookLibraryController.java
  @PostMapping
  @ResponseStatus(HttpStatus.CREATED)
  public Book addBook(@RequestBody Book book) {
      return bookLibraryService.addBook(book);
  }
We now create the Service method which will make the repository call to save the book.
// In BookLibraryService.java
  public Book addBook(Book book) {
      return bookLibraryRepository.save(book);
  }
 |
|---|
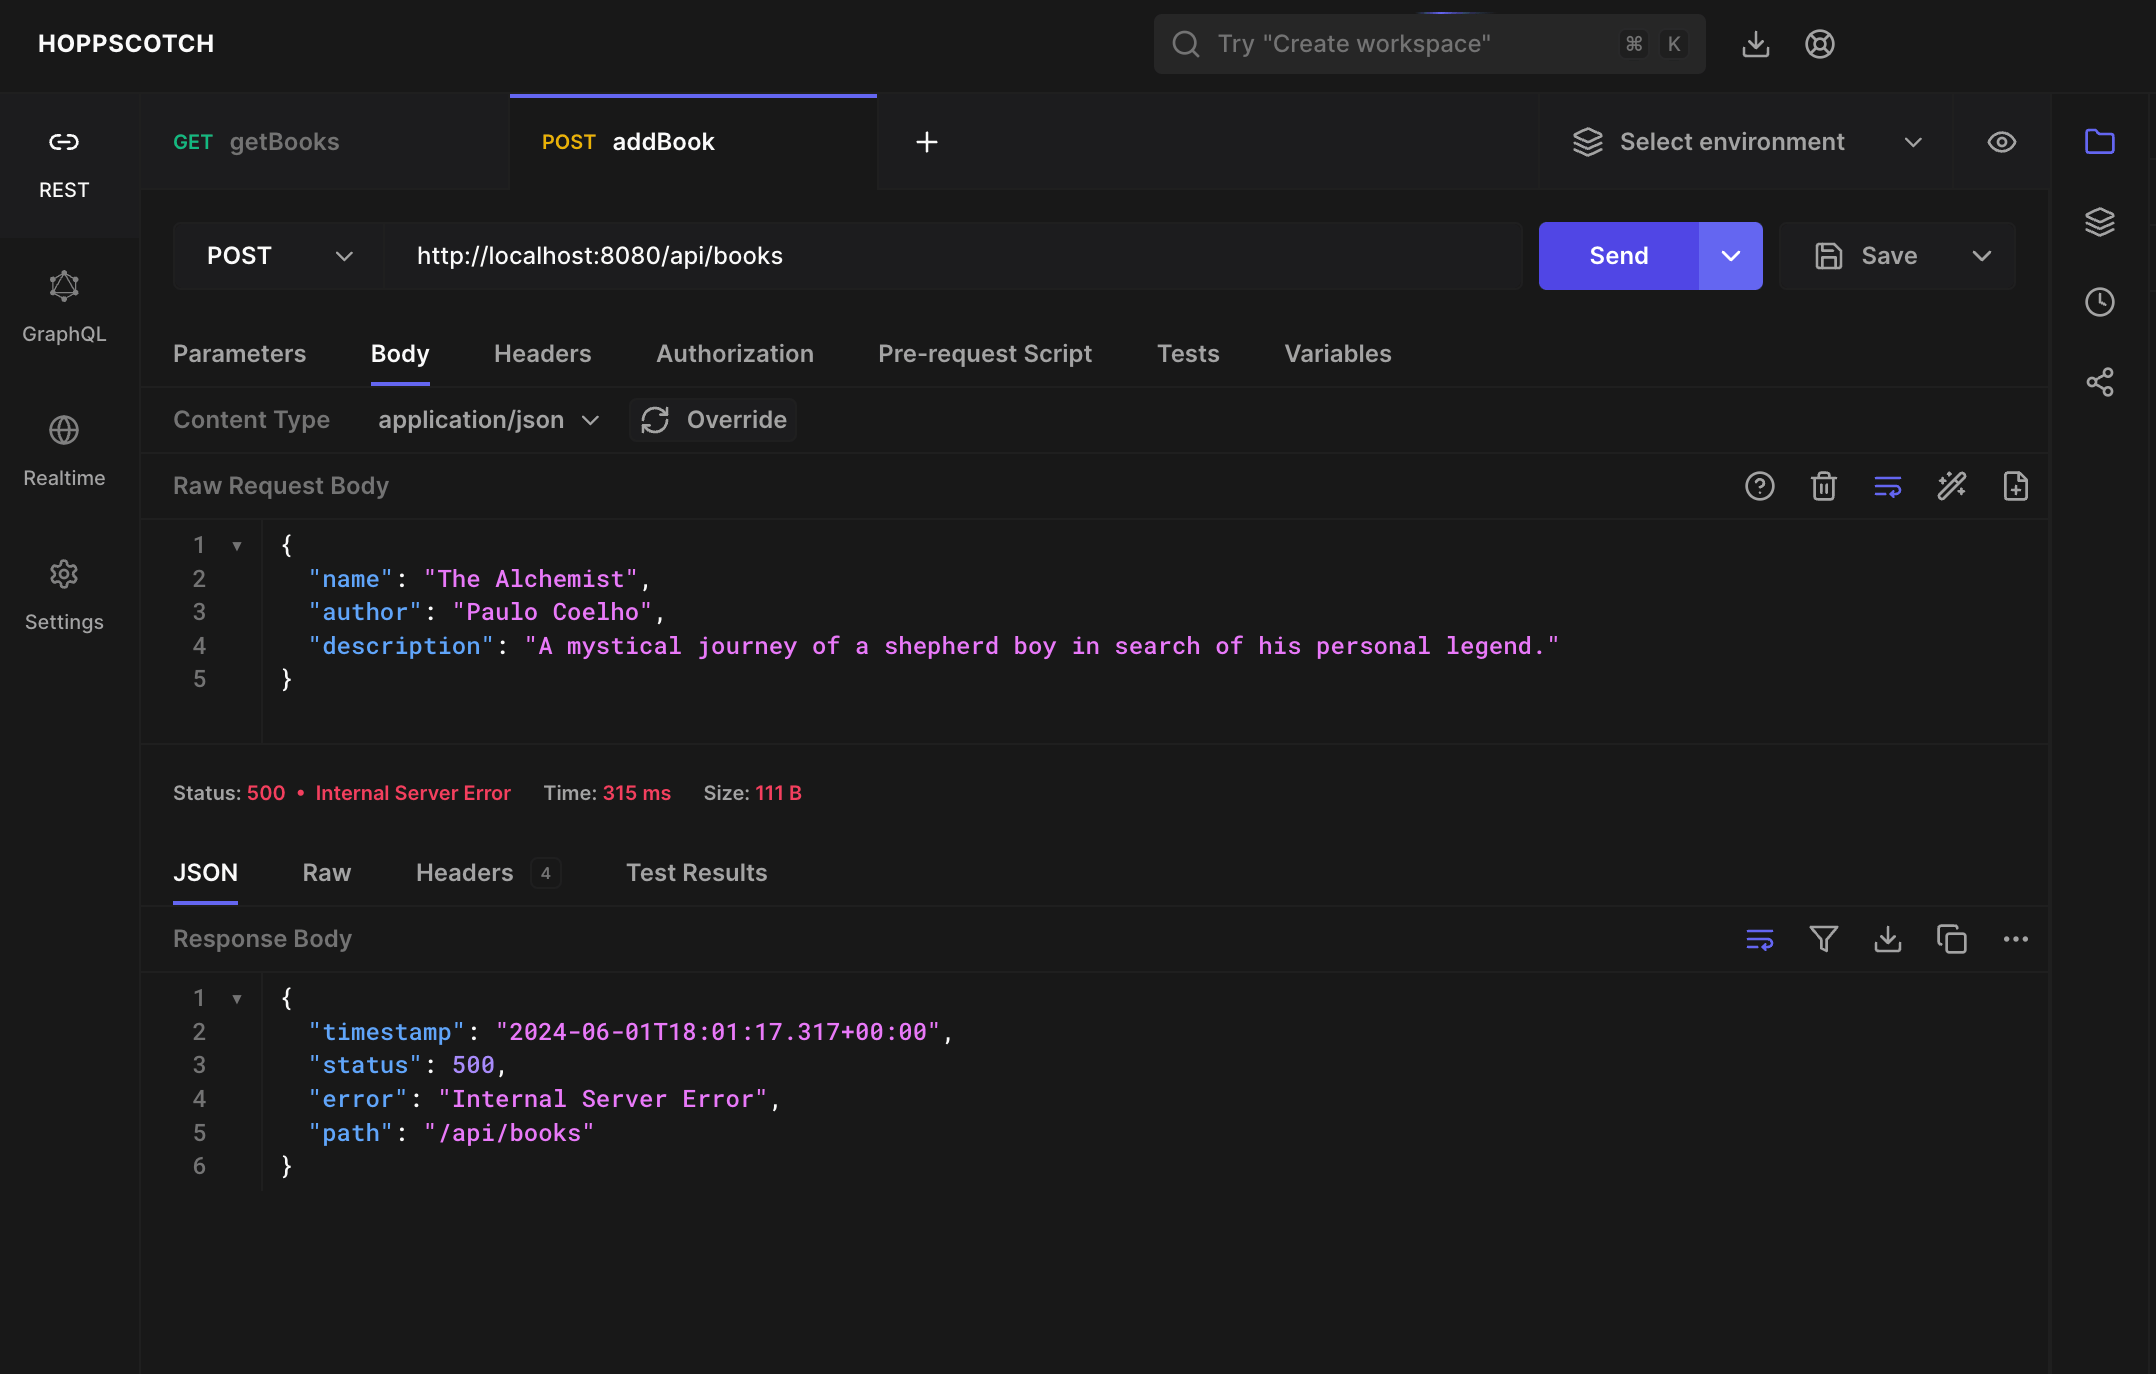
When you try to send a POST request you will encounter the following SqlExceptionHelper error.
  2024-06-01T17:33:42.470+01:00 ERROR 68886 --- [javaSpringBootBookLibrary] [nio-8080-exec-2] o.h.engine.jdbc.spi.SqlExceptionHelper   : Unique index or primary key violation: "PRIMARY KEY ON PUBLIC.BOOK(ID) ( /* key:1 */ 1, 'Harper Lee', 'A gripping novel about racial injustice.', 'To Kill a Mockingbird')"; SQL statement:
insert into book (author,description,name,id) values (?,?,?,default) [23505-224]
This error occurs because even though we are asking the database to auto-generate the id, the id field in the Book class, we are filling it with a value in the data.sql file. This causes a conflict when we try to insert a new book. To resolve this, remove the id field from the data.sql file.
INSERT INTO BOOK (NAME, AUTHOR, DESCRIPTION) VALUES ('To Kill a Mockingbird', 'Harper Lee', 'A gripping novel about racial injustice.');
INSERT INTO BOOK (NAME, AUTHOR, DESCRIPTION) VALUES ('Pride and Prejudice', 'Jane Austen', 'A classic romance novel.');
INSERT INTO BOOK (NAME, AUTHOR, DESCRIPTION) VALUES ('The Great Gatsby', 'F. Scott Fitzgerald', 'A story of the American dream gone wrong.');
INSERT INTO BOOK (NAME, AUTHOR, DESCRIPTION) VALUES ('Moby Dick', 'Herman Melville', 'A thrilling adventure of the whaling industry.');
INSERT INTO BOOK (NAME, AUTHOR, DESCRIPTION) VALUES ('The Catcher in the Rye', 'J.D. Salinger', 'A novel about teenage rebellion.');
INSERT INTO BOOK (NAME, AUTHOR, DESCRIPTION) VALUES ('The Hobbit', 'J.R.R. Tolkien', 'A fantasy adventure of a reluctant hero.');
INSERT INTO BOOK (NAME, AUTHOR, DESCRIPTION) VALUES ('Crime and Punishment', 'Fyodor Dostoevsky', 'A psychological drama about guilt and redemption.');
INSERT INTO BOOK (NAME, AUTHOR, DESCRIPTION) VALUES ('The Odyssey', 'Homer', 'An ancient epic of a hero''s journey home.');
INSERT INTO BOOK (NAME, AUTHOR, DESCRIPTION) VALUES ('The Adventures of Sherlock Holmes', 'Arthur Conan Doyle', 'Mysteries solved by the famous detective.');
INSERT INTO BOOK (NAME, AUTHOR, DESCRIPTION) VALUES ('Harry Potter and the Philosopher''s Stone', 'J.K. Rowling', 'The beginning of a young wizard''s journey.');
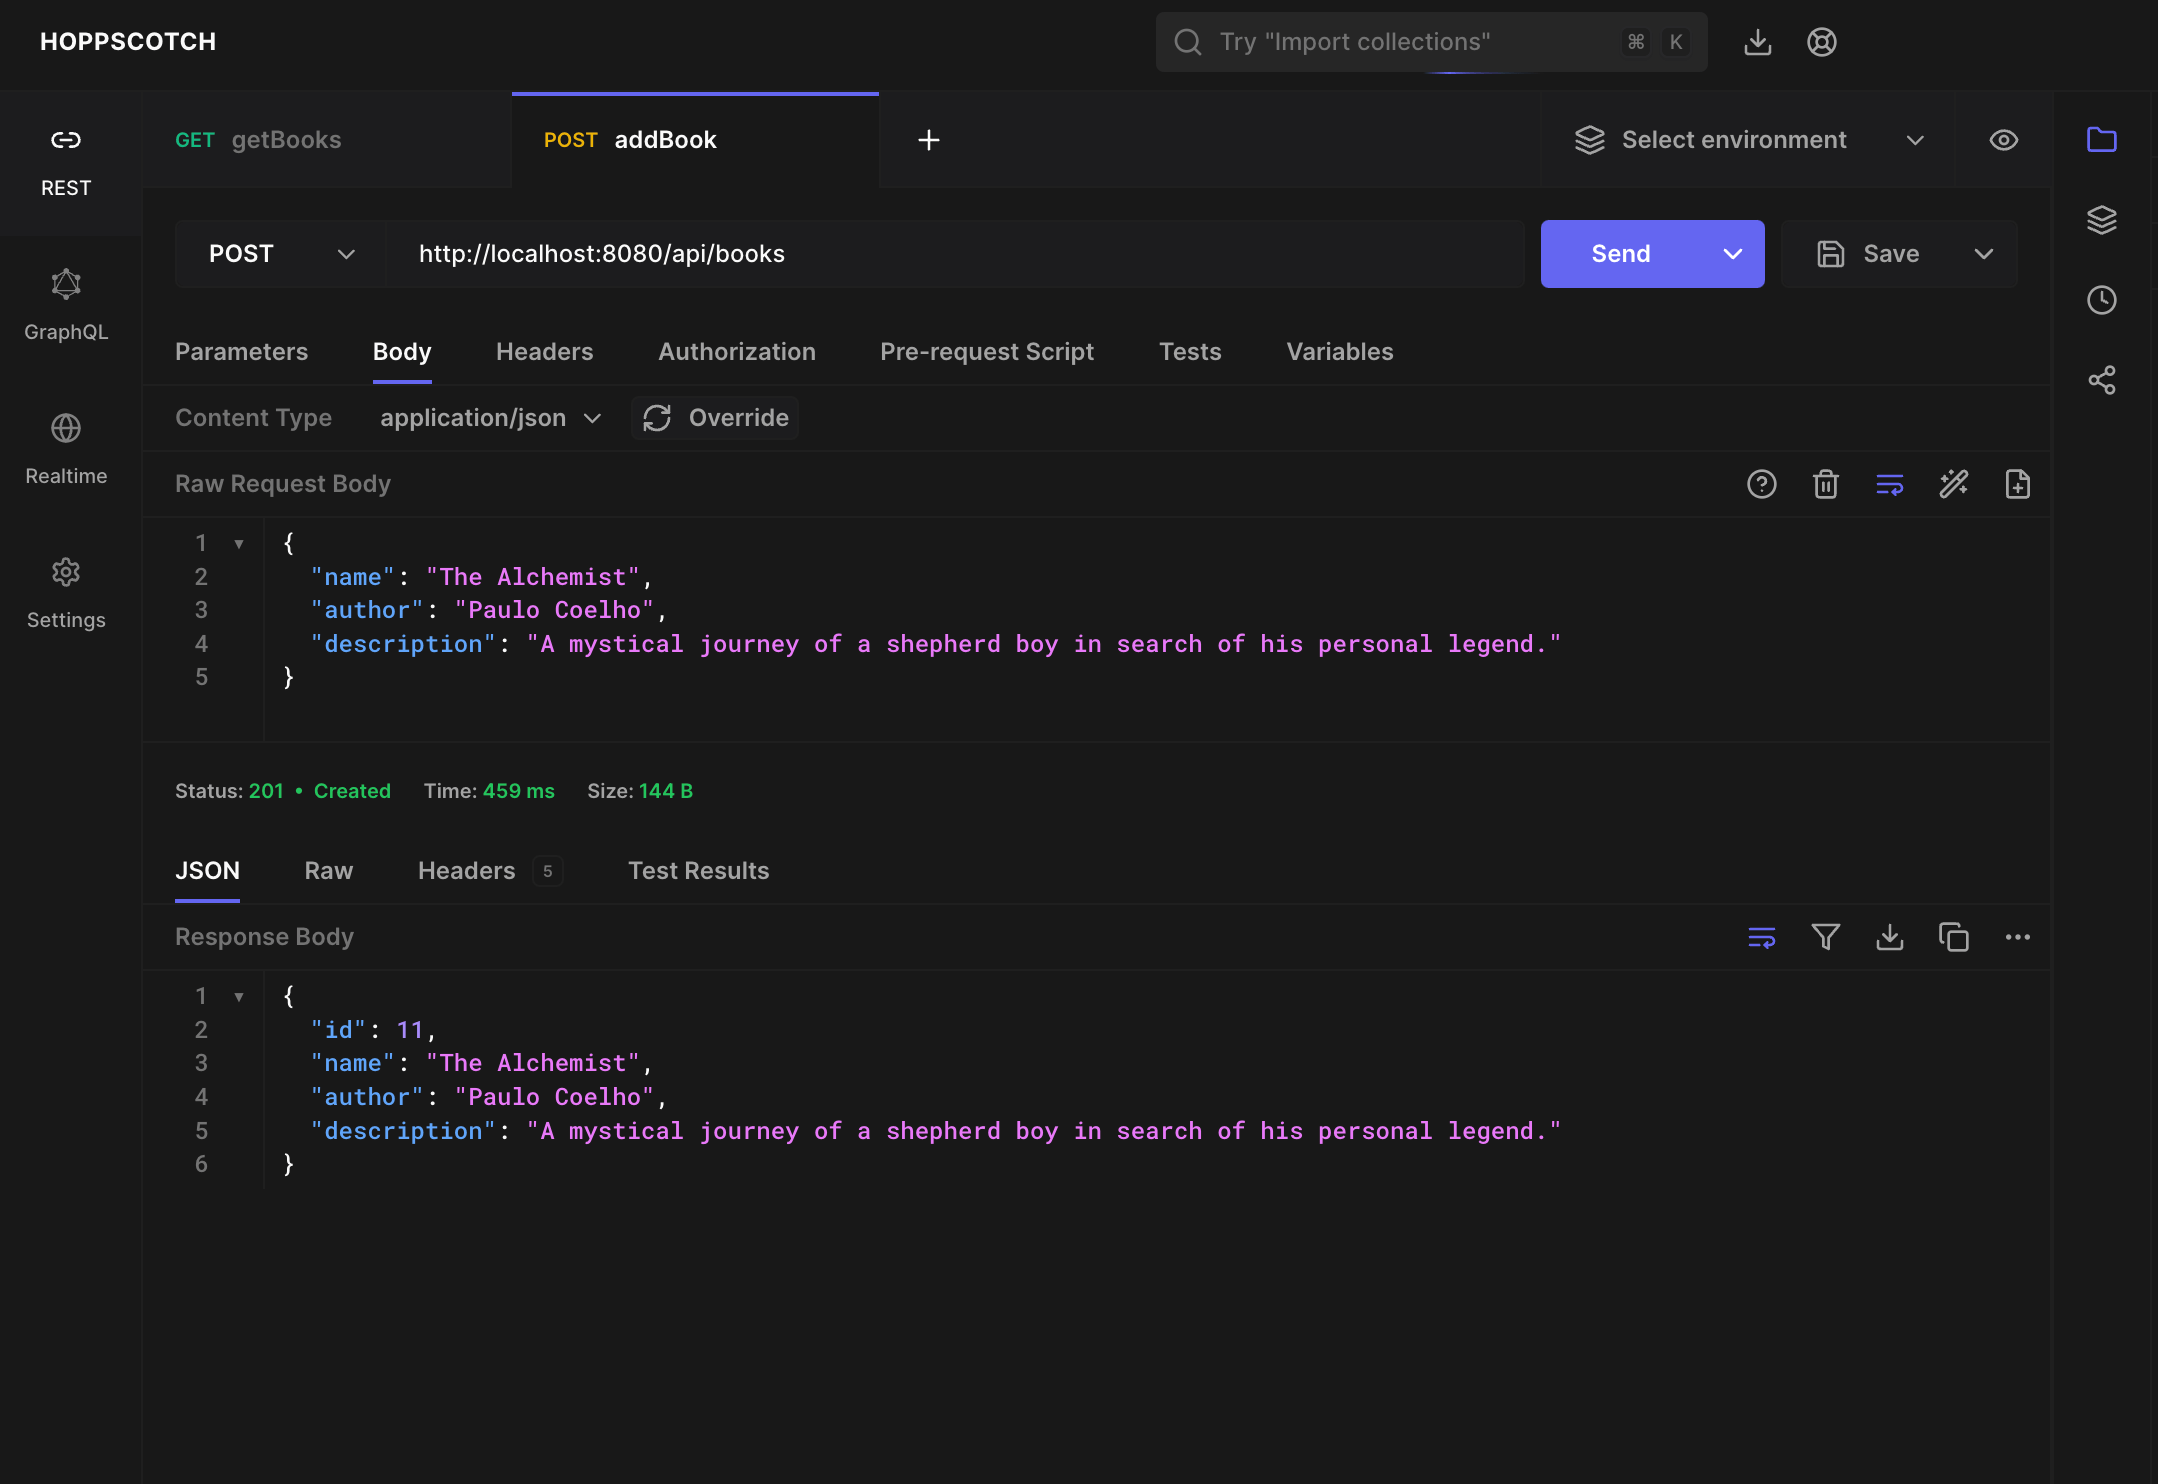
Re-run your app and re-send the POST request on Hoppscotch.io. You should see a success message with the newly created book details.
 |
|---|
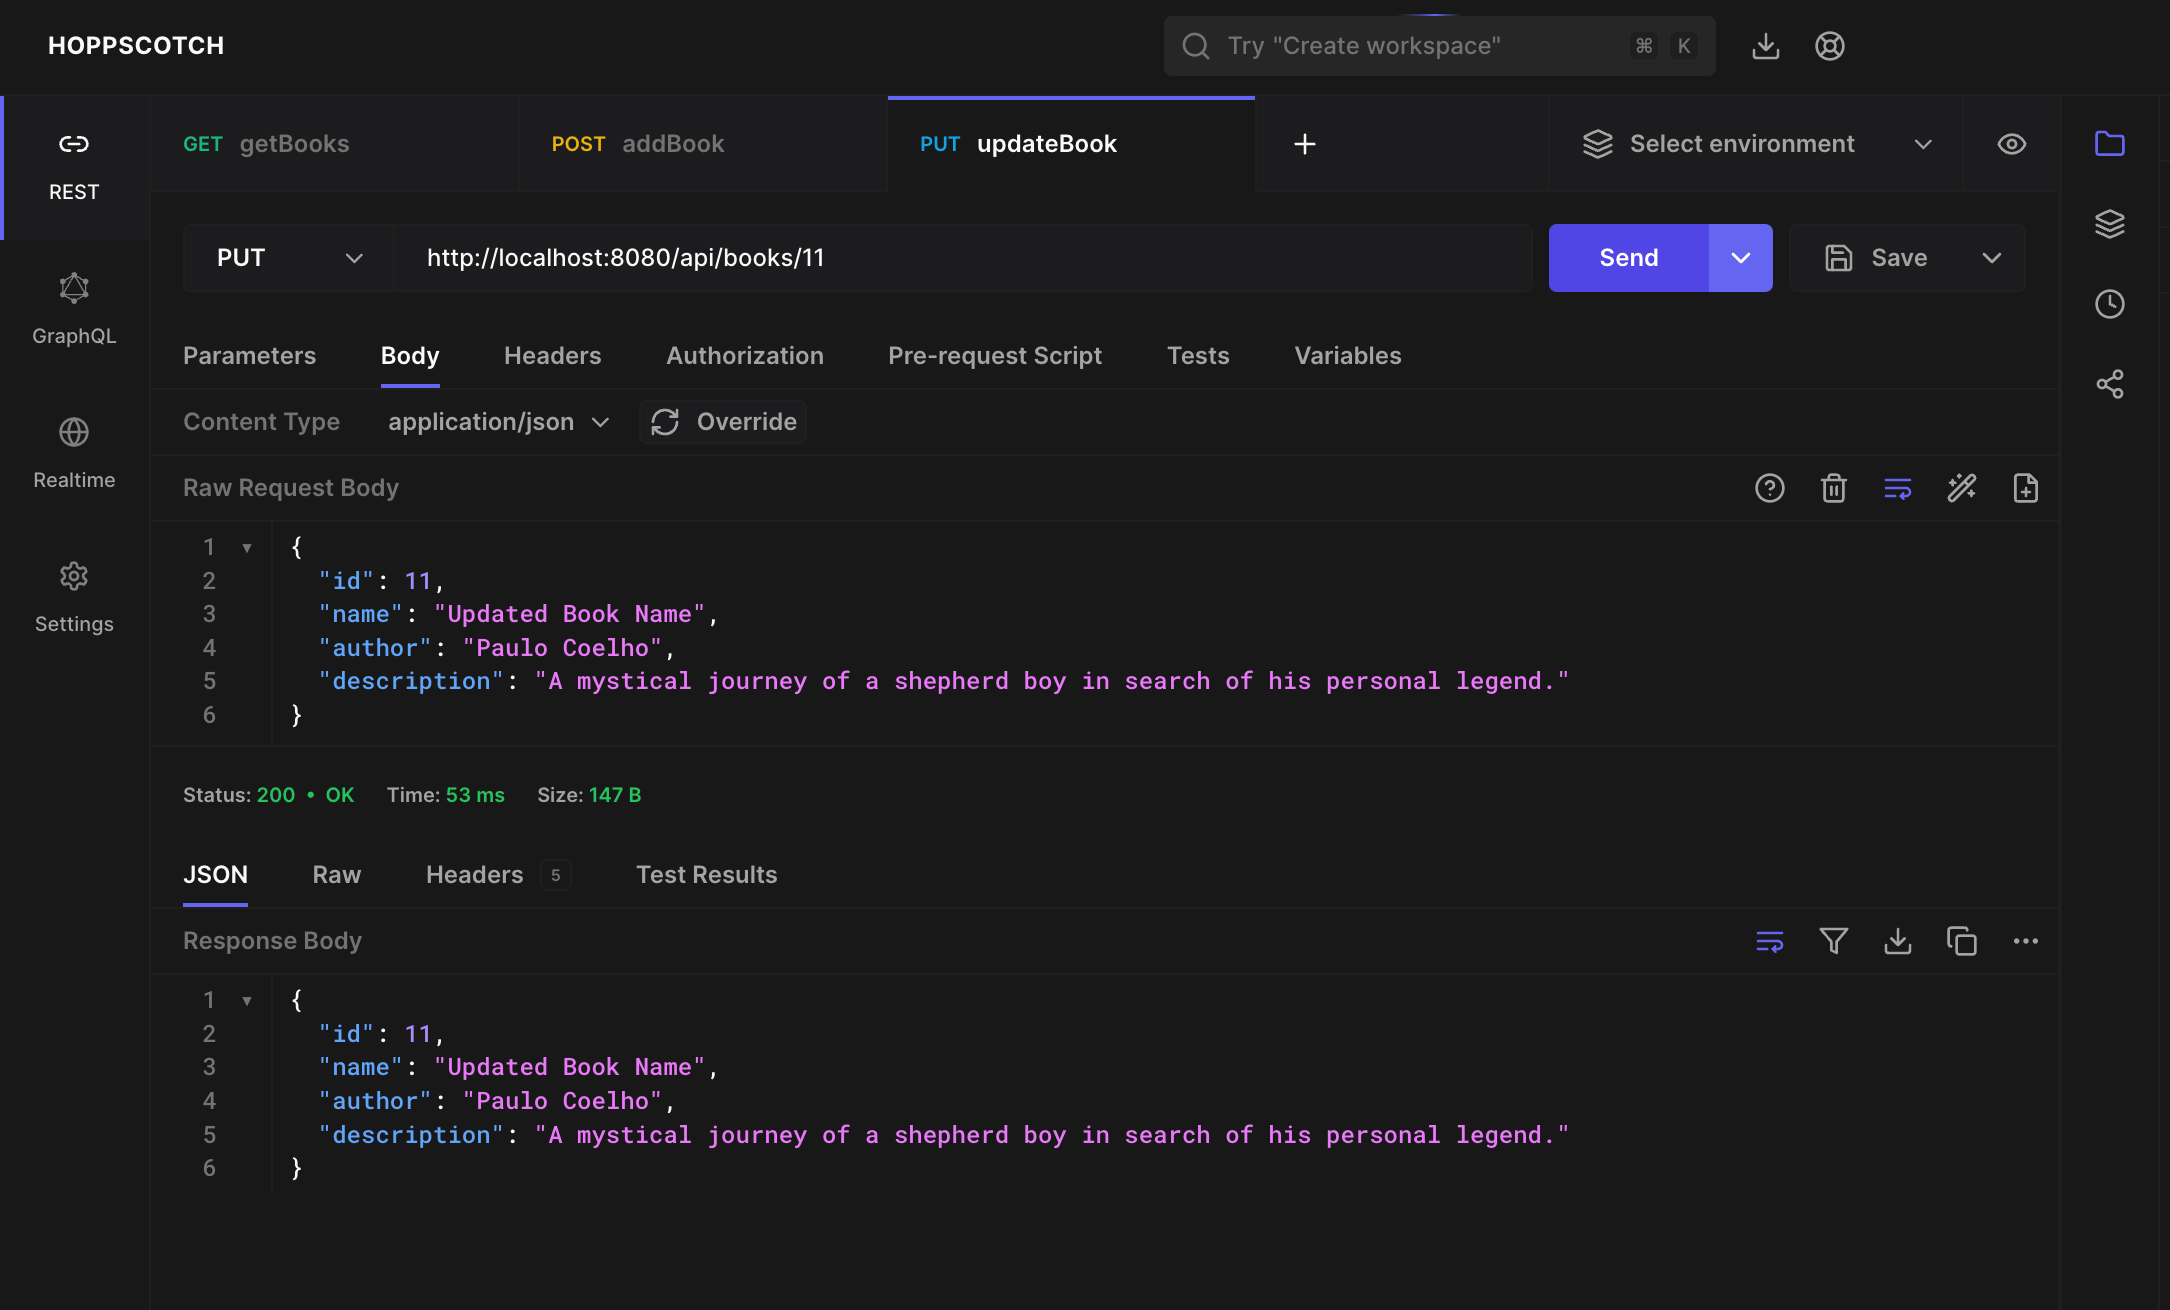
Update an Existing Book
To update an existing book, we need to implement a PUT API that accepts the book id and the updated book details. Add the following method to the BookLibraryController class:
// In BookLibraryController.java
  @PutMapping(value = "/{id}")
  public ResponseEntity<Book> updateBook(@PathVariable int id, @RequestBody Book updatedBook) {
      Book updated = bookLibraryService.updateBook(id, updatedBook);
      return new ResponseEntity<>(updated, HttpStatus.OK);
  }
We now create the Service method which will make the repository call to update the book.
// In BookLibraryService.java
  public Book updateBook(int id, Book updatedBook) {
      if (updatedBook.getId() != id) {
          throw new RuntimeException("The ID in the request body does not match the ID in the URL.");
      }
      Optional<Book> optionalBook = bookLibraryRepository.findById(id);
      if (optionalBook.isPresent()) {
          Book existingBook = optionalBook.get();
          existingBook.setName(updatedBook.getName());
          existingBook.setAuthor(updatedBook.getAuthor());
          existingBook.setDescription(updatedBook.getDescription());
          return bookLibraryRepository.save(existingBook);
      } else {
          throw new RuntimeException(String.format("Book with id {%s} not found", id));
      }
  }
 |
|---|
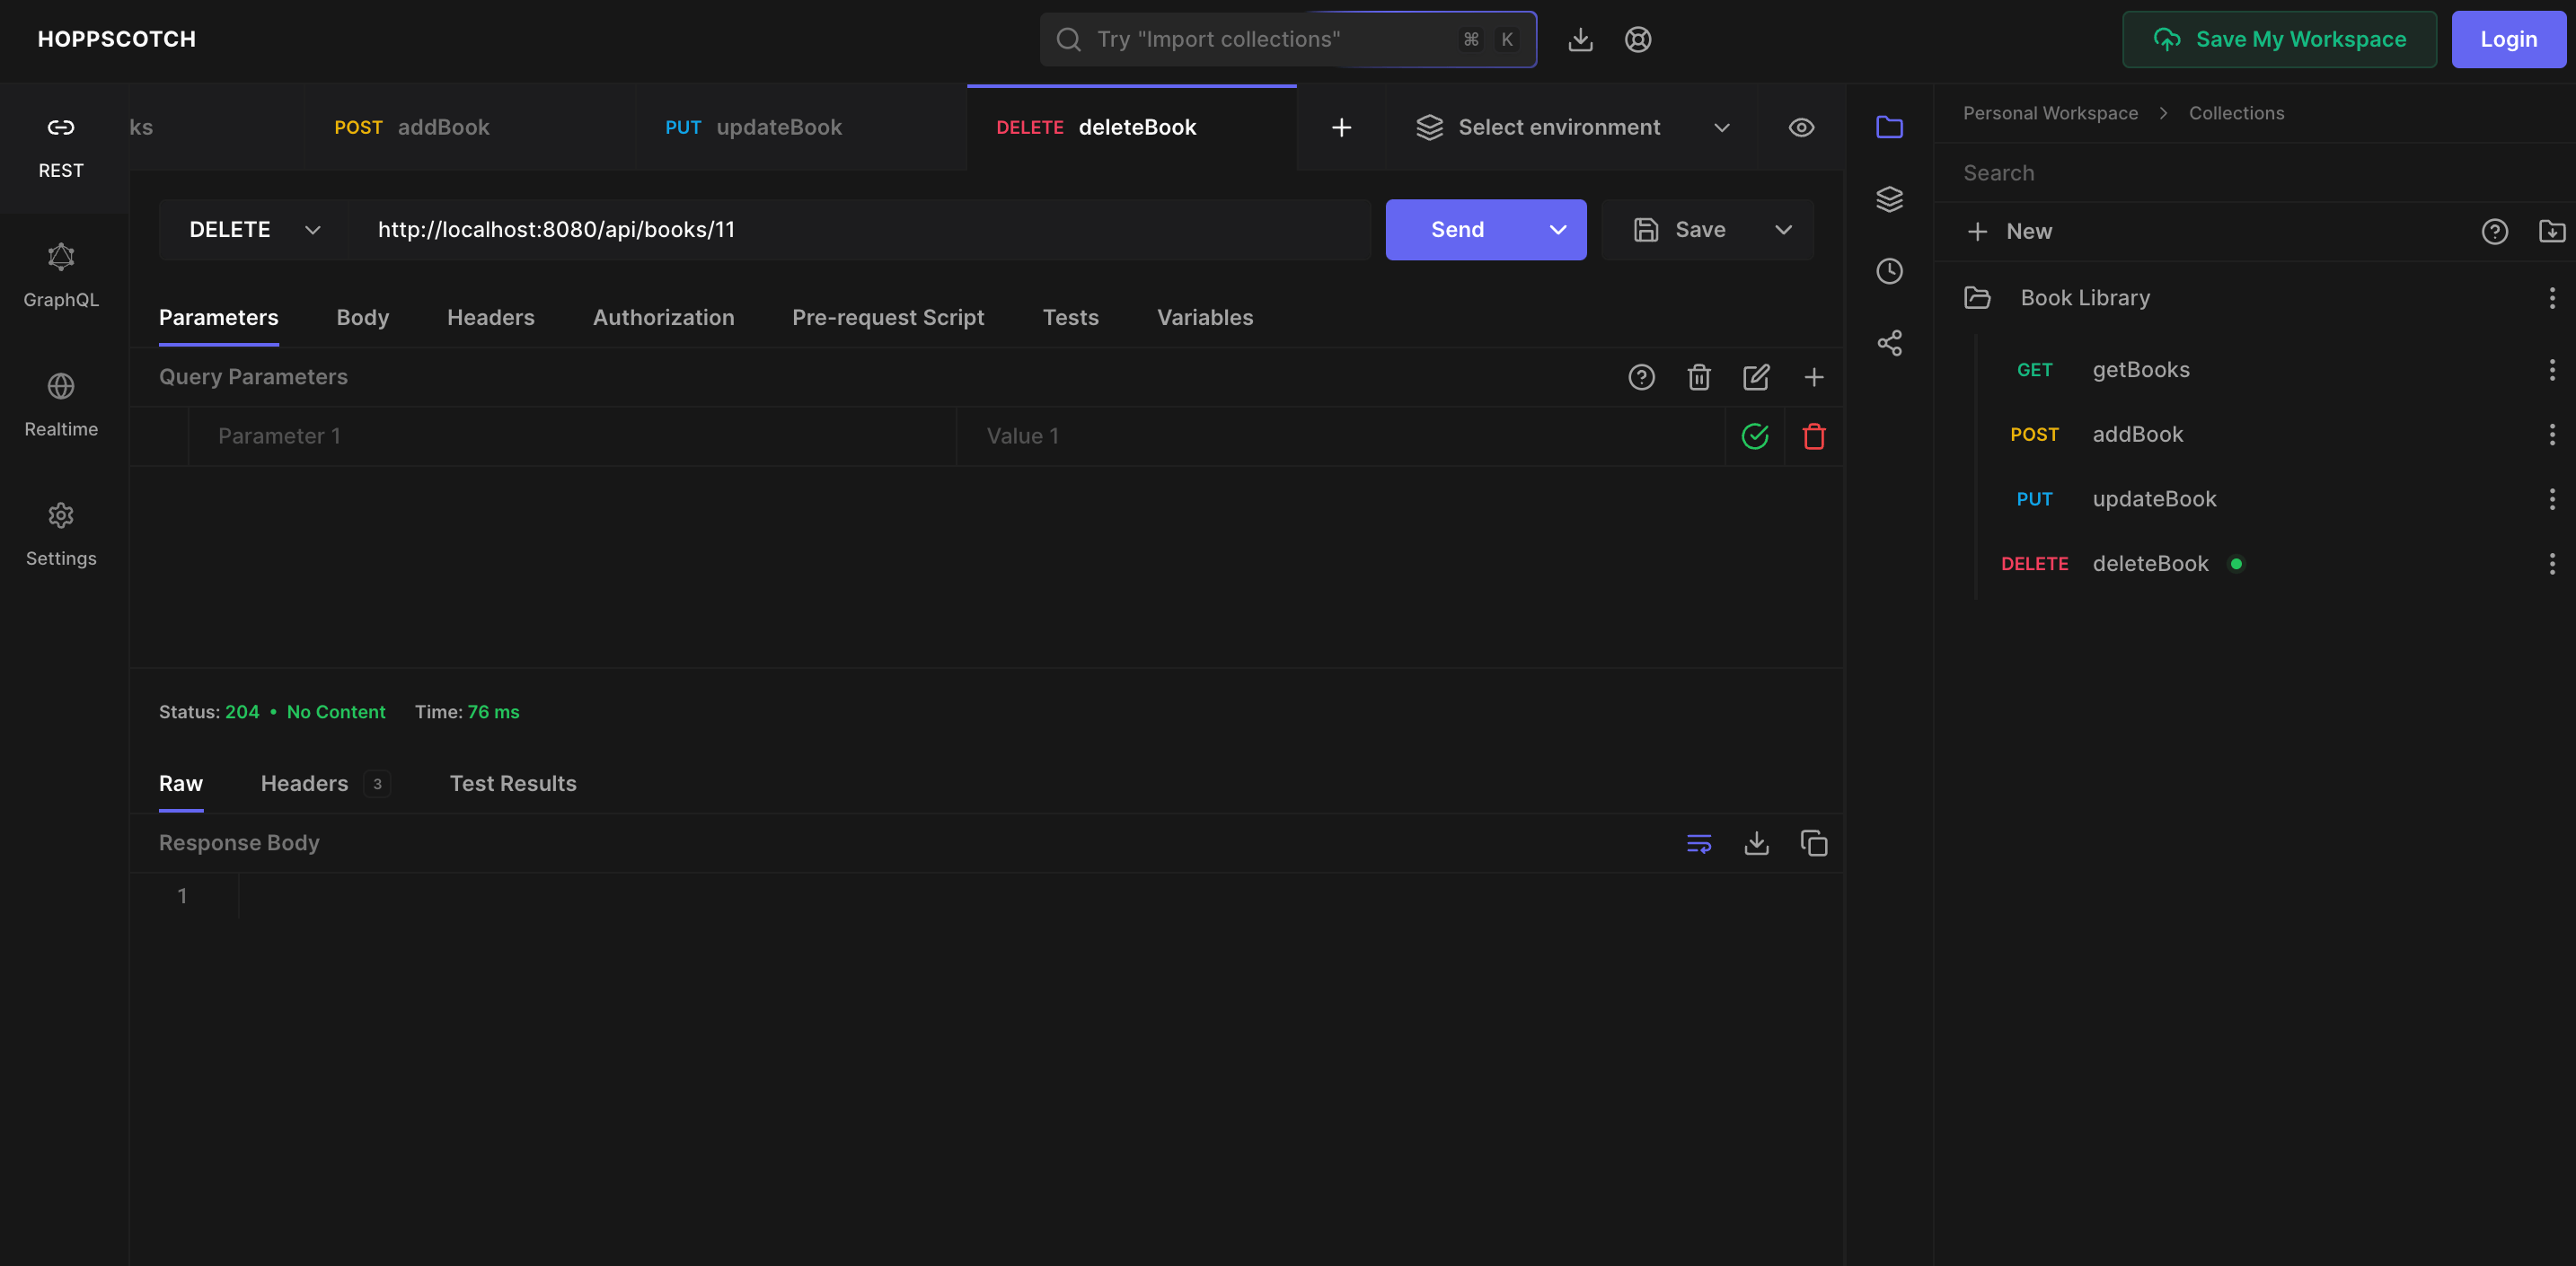
Delete a Book
To delete a book, we need to implement a DELETE API that accepts the book id. Add the following method to the BookLibraryController class:
// In BookLibraryController.java
  @DeleteMapping(value = "/{id}")
  @ResponseStatus(HttpStatus.NO_CONTENT)
  public void deleteBook(@PathVariable int id) {
      bookLibraryService.deleteBook(id);
  }
We now create the Service method which will make the repository call to delete the book.
// In BookLibraryService.java
  public void deleteBook(int id) {
      bookLibraryRepository.deleteById(id);
  }
 |
|---|
With that, we have successfully implemented the CRUD operations on the Book entity in our Java Spring Boot project.
Part 3 of this series will cover the testing of the CRUD operations using JUnit and Mockito. We will also create API documentation using Swagger and update our codebase with exception handling.